Wednesday 11 September 2019

How to Make Desi Ghee Poori Recipe |HealthyBreakfastRecipes

  How to Make Desi Ghee Poori Recipe
Feasting on special occasions and festivals is something that no one can get away with, and not even the ones who are always dieting. Poori is one food without which no one can imagine a festival with! Be it everyone’s favourite Aloo Tamatar or Kaddu Ki Sabzi, Poori goes with almost all the vegetables. This assorted deep-fried Indian bread is the most famous among not just among the north Indians but across the country. Here is a version of Pori which you will not even try to miss. Desi Ghee Poori looks exactly like any other Poori, but the taste will take you on another level of satisfaction. Serve this deliciousness to all your friends as well as the family members and they would not stop praising and complimenting your culinary skills and the magic in your hands. Made with the simplest of ingredients, these pooris will give a light and a comfortable filling to your stomach. What are you waiting for? Just use your culinary skills and make heaven for your loved ones.
Desi Ghee Poori Recipe

Desi Ghee Poori Recipe


Ingredients of Desi Ghee Poori

  • 2 cup whole wheat flour
  • 2 cup ghee
  • salt as required

How to make Desi Ghee Poori
Step 1- Prepare the dough for Desi Ghee Pooris
To start preparing delicious pooris, take a large mixing bowl and add whole wheat flour to it. In the centre, add the appropriate amount of water and start kneading the mixture to make a soft-medium smooth dough. Add 2 tablespoons of vegetable oil onto the dough and again knead it. The dough will start having a silky texture. Once the dough is ready, leave it in the fridge for 15 to 20 minutes.

Step 2- Roll the dough into a circle and deep fry
Put a kadhai over medium flame and heat ghee in it. Let the ghee warm and meanwhile, pull out a golf ball-sized portion from the dough and roll to form a disc shape. Carefully, drop the prepared disc into the hot ghee and with the help of a slotted spoon, press the poori so that it swells up. Flip and turn the pooris so as to cook all its sides until it turns golden brown in colour. Drain the excess ghee on an absorbent towel to soak extra ghee. Serve hot and fresh with your favourite sabzi.

Wednesday 31 July 2019

POTLAKAYA PERUGU PACHADI | Snake gourd yogurt pachadi||Healthy Breakfast Recipes

Snakegourd Perugu Pachadi Recipe


There are a huge number of people who love Perugu Pachadi (yogurt based dishes). Yogurt has been an inseparable part of our diet since inception. Owing to its amazing taste, this dairy product has numerous health benefits as well. The good bacteria present in the curd is responsible for healthy digestion of food, strengthening of bones, helps in losing weight and gives a healthy radiant skin. Now, coming to the main ingredient of this dish, snakegourd, which is rich in all the important minerals needed for a body to function, lessens the effect of diabetes, helps in combating jaundice and the list goes on and on. So if you have not already, do include this healthy and delicious vegetable in your diet. 
Snake gourd perugu pachadi recipe

Snake gourd Perugu Pachadi Recipe

We have brought before you an easy recipe for snake gourd Perugu Pachadi, that is going to do wonders for your health as well as to your taste buds. Prepare this palatable dish for all your loved ones and nourish them with good and healthy dishes. This delectable recipe would be perfect during potlucks or when you have invited your friends for a lunch party. We are here to help you enchant each and every taste bud with our simple recipes which are dedicated to helping you at every single step and all the necessary details too. So what is stopping you? Get up and show your culinary skills. Happy eating! 
Total Time :35m
Prep Time  :15m
Calories      :200
Servings     :3

Ingredients of Snakegourd Perugu Pachadi

  • 5 inches finely chopped snake gourd
  • 1/2 teaspoon mustard seeds
  • 1 dry red chili
  • 10 curry leaves
  • 1 tablespoon coriander leaves
  • 2 teaspoon ghee
  • 1/4 teaspoon urad dal
  • 1 1/2 cup yoghurt (curd)
  • 1/4 teaspoon cumin seeds
  • 1 dash asafoetida
  • 2 chopped green chilli
  • salt as required
  • 1 dash turmeric

How to make Snakegourd Perugu Pachadi

Step 1 - Combine water and curd in a bowl
To start preparing this delicacy, beat the curd to make it smooth and combine it with water in a mixing bowl. Stir the beaten curd and water until you observe a medium consistency. Add turmeric powder and salt and stir again. Keep this mixture aside for further use.

Step 2 - Prepare the tempering for the dish
Start heating ghee in a shallow frying pan on a medium flame. After the ghee heats up, add cumin seeds and mustard seeds. After you observe that the seeds are sputtering, add urad dal and let it cook until it turns red. Next, put dry red chili, green chili, asafoetida, curry leaves and snake gourd pieces into the mixture. Now let the entire amalgamation cook on a medium flame for about 8 to 10 minutes or until the snake gourd pieces start to tenderize.

Step 3 - Combine the cooked snake gourd pieces with curd mixture and serve
After the snake gourd mixture is cooked, remove it from the heat and allow it to cool. Lastly, combine the mixture with the beaten curd and water (Step 1) and garnish with fresh coriander leaves. Serve fresh.

Saturday 1 June 2019

Mango Shrikhand Tart recipe||How to Make Mango Shrikhand Tart recipe ||HealthyBreakfast Recipes

      Mango Shrikhand Tart Recipe

Craving for something sweet? Satiate your sweet cravings with this succulent Mango Shrikhand Tart recipe and a dessert that will make your taste buds go wow. Summers are here and it's almost time to delve in the flavours of juicy mangoes and dishes made out of them. So, here is a dish which is a perfect summer treat for you. This Fusion recipe is served in a tart shell with creamy mango shrikhand filling. Though, you can easily buy these tart shells from the market, but here in this recipe an easy way has been explained to prepare the homemade tarts. All you need to prepare this mouth-watering dessert is: All purpose flour, butter, salt, yoghurt, icing sugar, mango puree, whipped cream and you are good to go. It is further garnished with mint leaves. One bite of this heavenly treat and you will certainly fall in love with it. Your kids will love these scrumptious shrikhand tarts and will be asking for more for it. You can prepare this lip-smacking delicious dessert recipe for kids birthday as well as kitty party. We are sure, this tart recipe will gain you lots of compliments. So, what are you waiting for? Go ahead and try this dessert recipe now and enjoy it with your loved ones.

Saturday 25 May 2019

Mango Pickle Recipe || How to Make Tasty Mango Pickle Recipe || Healthy Breakfast Recipes

               Mango Pickle Recipe

Pickle is an integral part of North Indian cuisine and you can find variety of pickles. Here is a simple Pickle Recipe which is prepared using raw mangoes, mustard oil, pickle masala, and salt. Traditionally, pickles need a few days to get ready and are sun-dried, however, this is an easy-to-make side dish recipe that will be ready in a day. You just need to warm the mustard oil and cut the mangoes in pieces and then mix together all the ingredients. You must try this easy recipe for your loved ones, it will give your taste buds a delectable experience.

Tuesday 21 May 2019

Tuesday 14 May 2019

How to Make Tasty Chicken Stuffed Bread Recipe|Healthy Breakfast Recipes

      Chicken Stuffed Bread Recipe

Chicken Stuffed Bread is a delicious snack recipe that you prepare for your loved ones on occasions like potluck and kitty party. It is cooked using shredded chicken, dry yeast, all-purpose flour, salt, refined oil and butter, and is tossed in thick white sauce. It can be prepared easily and can be savoured by both kids and adults. If you are planning to host a house party and don't know what to cook, then this scrumptious Fusion recipe is a perfect solution that can be a refreshing option. It can be prepared at home in a jiffy and can be your go-to-meal. Loaded with zesty cheese and chicken that are stuffed into soft bread, this non-vegetarian snack recipe will be surely loved by your guests. Try out this flavoursome and lip-smacking chicken bread at home and gather all the applause from your friends and family for your culinary skills.

Saturday 4 May 2019

Can adding butter to your coffee help you lose weight?||Healthy Breakfast Recipes

Can adding butter to your coffee help you lose weight?

No matter which diet you are following, a cup of coffee can be a part of all of them. And if you are someone who can’t do without two or three cups of coffee in a day and also feel guilty about it later, this article is for you.


Butter coffee

Butter Coffee

If you are looking for ways to make your coffee healthier, stirring a blob of butter in it might be the answer for you. Though coffee lovers might find it disgusting and wellness experts are praising this buttery beverage a little too much. According to experts, this surprising trick can work wonders for your health and weightloss.

Thursday 25 April 2019

Keto Lemon magic Custard Cake -Low Carb ||Healthybreakfastrecipes

Keto Lemon Magic Custard Cake – Low Carb

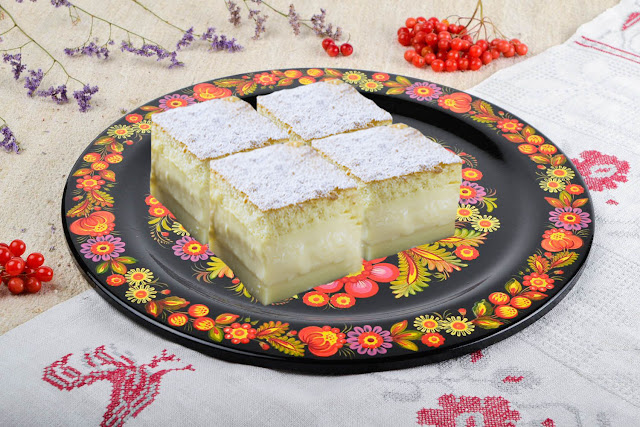
This Keto Lemon Magic Custard Cake has an ethereal texture and bright lemon flavor that will make it hard to stop at just one slice!

Total Time:1hr

Prep Time:20min

Author :Nithya

Keto Lemon Magic Custard Cake - Low Carb

Keto Lemon Magic Custard Cake -Low Carb

This Keto Lemon Magic Custard Cake (or simply Magic Cake) is my first attempt at replicating the classic magic cake, which uses a single batter that separates into three layers during baking.  In a typical magic cake, you end up with a dense bottom layer, custardy middle layer, and ethereal light and spongy layer on top.

 This Keto Lemon Magic Cake produced a much lighter texture than the classic, which I didn’t mind at all.  In fact, the contrast between the smooth custard and slightly grainy “cake” top, was so pleasing, that it was hard to stop eating them!

Friday 19 April 2019

Vegan Ice Cream with Banana and Choco Chips Recipe || HealthyBreakfastRecipes

Vegan Ice Cream with Banana and Choco Chips Recipe


Total Time :1h
Prep Time  :60 m
Calories      :212
 Ice cream is an ultimate comfort food for the summer and here is a vegan recipe that all the health conscious people would love to have without feeling guilty. Prepared using bananas, chocolate chips, vanilla extract, honey, and walnuts, this is an easy-to-make ice-cream recipe that you can try at home for your family and friends. It is a perfect summer recipe and is best enjoyed when paired with hot and sizzling brownies, though you can enjoy this Ice cream as it is. You can make this dessert recipe in just two steps and it will save a lot of your time and efforts. If you are getting to host a party at home and have some vegetarian guests coming back over and then this should be your go-to dessert recipe as it takes very less time in its preparation. Try it and enjoy!


Vegan Ice Cream with Banana and Choco Chips Recipe

Vegan Ice Cream with Banana and Choco Chips Recipe

 Ingredients of Vegan Ice Cream with Banana and Choco Chips 

    3 banana
    1 tablespoon vanilla extract
    3 tablespoon honey
    4 tablespoon chocolate chips
    4 tablespoon walnuts

How to Make Vegan Ice Cream with Banana and Choco Chips

Step 1
Take a blender jar and add the peeled and chopped bananas in it, blend well to make a smooth puree. Once done, add the chocolate chips, walnuts, 2 tablespoons of honey and vanilla extract in it and blend once again.

Thai Mango Chicken Curry Recipe|| HealthyBreakfastRecipes

    Thai Mango Chicken Curry Recipe

    Mango fruit is a tropical and is so used a lot in South Asian countries. Thailand has so created a dish which combines the sweetness of ripe and juicy mangoes with chickenThai Mango Chicken Curry is the amalgamation of different flavours - it is sweet, bitter and spicy at the same time. This dish is a must-have throughout summers, as it is refreshing and contains less calories than a normal chicken curry. Serve this dish on a bed of steamed white rice and you won't be able to forget the deliciousness of this recipe for days.


Thai Mango Chicken Curry Recipe

             Thai Mango Chicken Curry Recipe


    Total Time : 35m
    Prep Time  :10 m
    Calories      :198
    Servings     :6
   Author         :Nithya

 Ingredients of Thai Mango Chicken Curry

  •     4 chopped ripe mangoes
  •     2 red chilli
  •     2 tablespoon vinegar
  •     1 ginger
  •     7 cloves garlic
  •     1/2 teaspoon turmeric
  •     1 cup vegetable oil
  •     2 chopped red bell pepper
  •     salt as required
  •     1 kilograms chicken breasts
  •     3 tablespoon soy sauce
  •     3 tablespoon lime juice
  •     4 tablespoon fish sauce
  •     2 tablespoon sugar
  •     2 cup flour
  •     4 kaffir lime leaves
  •     water as required
  •     For Garnishing 4 slices apple

    Thai Mango Chicken Curry Recipe

    Thai Mango Chicken Curry Recipe


How to make Thai Mango Chicken Curry 

Step 1

The first step is to arrange the mango sauce for the curry. Blend together the mango chunks, red chili, fish sauce, vinegar,soy sauce, sugar, ginger, garlic, lime juice, kaffir lime leaves and turmeric in an exceedingly kitchen appliance. Blend till the resulting mixture is a smooth paste. After that, cut the chicken breasts into chunks.


 Step 2

 Now, take a large bowl and mix together the flour and salt. Add the Chicken Chunks in the flour until the pieces are evenly coated. Heat the oil in a pan, and fry the Chicken pieces till golden brown in colour on medium flame.

Thai Mango Chicken Curry Recipe

Thai Mango Chicken Curry Recipe


Step 3
Next in a different pan, add the mango sauce and the chopped red bell pepper. Put the pan over medium-high flame. Bring it to a boil, and then let it simmer by lowering the flame. If the sauce becomes too thick and add a couple of teaspoons of water. Simmer for about 3 minutes and until the peppers tenderize.

Step 4

Lastly, add the fried chicken pieces to the simmering sauce and while stirring the pieces into the sauce so that it coats the pieces completely. Let it stay on the flame for a few minutes. Once done, transfer the Chicken Curry in a dish and garnish with apple slices.Serve this curry with Rice and Chapatis.

Saturday 13 April 2019

Cinnamon Zucchini Walnut Cake with Cream Cheese Frosting Recipe||HealthyBreakfastRecipes


Cinnamon Zucchini Walnut Cake with Cream Cheese Frosting Recipe

   
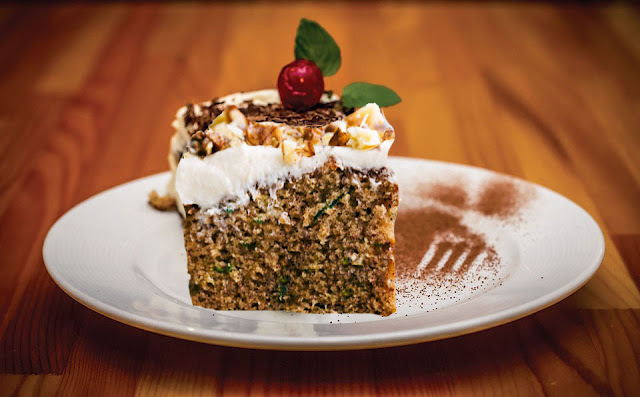
Cinnamon Zucchini Walnut Cake with Cream Cheese Frosting is a sinful and ambrosial delight that may build anyone go weak and ditch their diets. Created victimization all purpose flour, zucchini, walnuts, butter, cream cheese,light whipping cream, brown sugar, powdered sugar, eggs and cinnamon, this dessert cake recipe is absolutely delicious and can be easily made at home. You can serve this Continental recipe with ice cream to make it even more delicious. Occasions like kitty parties, potlucks, picnics and birthdays are apt to relish this delicious dessert recipeand will surely leave everybody astounded with its lip-smacking taste. Prepare this easy recipe this weekend and surprise your loved ones right away! 


Cinnamon Zucchini Walnut Cake with Cream Cheese Frosting Recipe

    Cinnamon Zucchini Walnut Cake with Cream Cheese Frosting Recipe


   Total Time :45m
    Prep Time :10 m
        Calories :444
      Servings  :16
         Author :Nithya

(Also Read :How to Make Tasty Prawn Biryani Recipe)

Ingredients


  • 3/4 cup brown sugar
  •     4 egg
  •     2 cup all purpose flour
  •     1 teaspoon baking soda
  •     1/2 teaspoon salt
  •     1 cup chopped walnuts
  •     230 gm cream cheese
  •     3 tablespoon whipping cream
  •     3/4 cup sugar
  •     1 cup canola oil/ rapeseed oil
  •     2 teaspoon cinnamon
  •     1/2 teaspoon baking powder
  •     3 1/2 cup grated zucchini
  •     1/4 cup unsalted butter
  •     1 teaspoon vanilla extract
  •     3 cup powdered sugar

How to make Tasty Cinnamon Zucchini Walnut Cake with Cream Cheese Frosting


Step 1
To prepare this cake recipe, preheat oven to 350°Fahrenheit. Lightly grease a 9-inch pan with non-stick cooking spray. In a large bowl, beat together brown sugar, sugar, eggs, and canola oil until combined. Set it aside.


Cinnamon Zucchini Walnut Cake with Cream Cheese Frosting Recipe

     Cinnamon Zucchini Walnut Cake with Cream Cheese Frosting Recipe


Step 2
In a bowl, sift the flour, cinnamon, baking soda, baking powder and salt. Combine dry ingredients with the wet ingredients. Stir in zucchini and walnuts and whisk it well until you get a smooth batter. Pour batter evenly in the greased pan. Bake for 35-40 minutes in the preheated oven until toothpick inserted comes out clean. Once done, take it out of the oven and cool it completely.


Step 3
For the frosting, beat the butter and cream cheese along till creamy. Now, add vanilla extract and whipping cream in it and beat until combined. Now, add the powdered sugar and mix it well. Now, apply the frosting on the cooled cake and serve it immediately to enjoy!